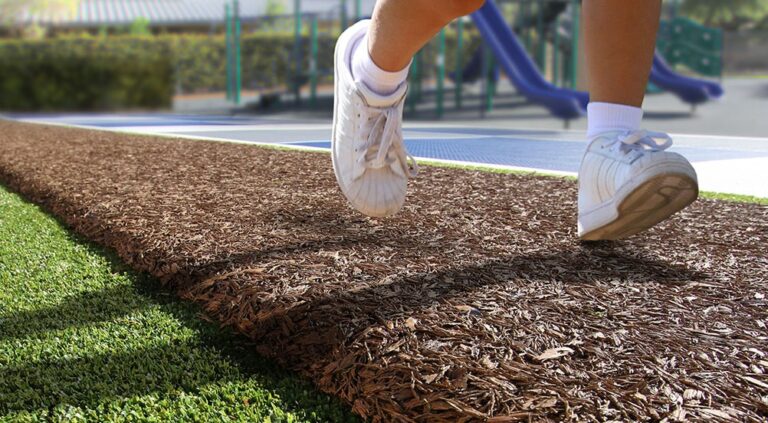
When used correctly, mulch glue provides an extremely effective method for securing rubber mulch in outdoor settings. The liquid adhesive bonds shredded tire rubber together and to the base surface below. Rubber mulch has become an increasingly popular landscaping material for both residential and commercial properties. Made from recycled tire rubber, this type of mulch offers several benefits over traditional organic mulches. Rubber mulch does not decompose, so it lasts longer. It also provides a safe, cushioned surface for play areas and is highly durable.
However, rubber mulch is lightweight and can be displaced by rain, wind, activity, or animals. Gluing the mulch together and securing it to the ground below helps prevent erosion and maintain coverage. But does mulch glue actually work on rubber pieces? Let’s take a closer look.
Evaluating Mulch Glue Options
Mulch glue, also called mulch binder or mulch tackifier, is a liquid adhesive formulated to keep mulch anchored in place. It works by coating the mulch materials and then drying to an abrasion-resistant bond. When researching mulch glues, look for the following key features:
- Designed specifically for use with rubber mulch. Some products are made only for natural mulches like wood, bark, or straw. Using the wrong adhesive could result in a poor bond.
- Flexible bonding. As rubber mulch expands and contracts slightly with temperature changes, the glue needs flexibility without becoming brittle and cracking apart.
- UVA/UVB ray protection. Sunlight can degrade adhesives over time. Ultraviolet radiation stabilized formulas last longer outdoors.
- Water resistance. The glue needs to cure to a waterproof film that won’t re-emulsify when wet. Heavy rains should not break the bond.
- Environmentally friendly. Products made from plant-based materials or free from harmful VOCs ensure safe use around children and pets.
Preparing the Base Surface
Installing rubber mulch begins with proper base preparation. The ground surface below the mulch plays a key role in keeping the material from shifting around.
Remove any old mulch, dirt, or vegetation from the installation area. Evaluate the current surface. Bare earth may be susceptible to weed growth. Gravel, stone, or pavers allow drainage but have joints where mulch can sink and shift.
For best results, install landscape fabric over the base surface. This creates a continuous weed barrier and provides a tacky foundation for the mulch. Anchor the edges with stakes or landscape staples.
Any major dips or bumps in the ground should be leveled for a flat, consistent surface. This helps the mulch lie evenly.
The base material and preparation allow the mulch glue something to stick to. With an intact foundation, the adhesive bonds between the rubber, fabric barrier, and soil will be stronger.
Installing and Spreading Rubber Mulch
Once the base surface is ready, the rubber mulch can be installed right on top. Pour and spread the shredded rubber pieces across the fabric barrier in a 2-3 inch continuous layer. Rake the material smooth, filling in any low spots as needed.
The mulch must be dry before applying any adhesive. Severe wetness or moisture will prevent proper bonding. Install during dry weather or allow wet mulch to dry completely first.
Test drainage by watering a small section. The mulch should absorb water but not become soggy or hold standing water. Proper drainage is necessary for glue cohesion.
With the rubber mulch spread evenly across the area, it can be glued into place.
Applying Mulch Glue
Always refer to the manufacturer’s instructions when using a mulch glue product. However, the basic process is the same for most adhesives:
- Stir or agitate the glue before use to achieve a uniform consistency.
- Pour the adhesive into a sprayer or applicator for easy, controlled dispersion.
- Mist a light, even layer of glue over the entire surface of the rubber mulch. Coat both sides of any vertical edges as well.
- Allow 10-15 minutes of dwell time for the glue to begin soaking in.
- Apply a second, follow-up coat to further saturate the rubber. This double application ensures maximum tackiness.
- Let the glue penetrate and cure for 24 hours. Avoid walking on the treated area during this time.
The mulch glue should be scratched into the rubber with a stiff broom. This agitation evenly integrates the adhesive down into the shredded material. Continue scrubbing until the mulch feels firmly secured.
Properly applied mulch glue will initially appear glossy on the rubber mulch pieces. As it cures, the finish becomes matte. A slight rubbery odor is normal during application. This dissipates as the adhesive dries.
Maintenance and Reapplication
Mulch glue provides season-long adhesion. However, the effects do wear off over time. Expect to reapply glue every 9-12 months as needed. This maintains optimum bonding and a neat appearance.
Routine maintenance like occasional sweeping or hosing keeps the rubber mulch looking fresh. Agitation helps settle the material and prevent decompression. Deeper raking or churning should be avoided as it could loosen the glue bond.
Heavy activity may displace some pieces over time. This is normal but easy to correct. Simply push the shifted rubber back into place. If numerous bald spots appear, a full reapplication may be needed sooner.
For small repairs, carefully lift the affected mulch and apply a small amount of glue before resetting. This spot-sealing avoids having to coat the entire area.
Properly glued rubber mulch provides safety, cushioning, and beauty without constant maintenance. A little seasonal renewal keeps the landscaping anchored for years of enjoyment.
FAQ
How Does Mulch Glue Work?
Cementing a robust connection between the mulch and the targeted surface, mulch glue typically cures to form a flexible and water-resistant coating. This ensures a dependable grip while preserving the capacity for some degree of flexibility and movement.
How Do You Get Rubber Mulch to Stay in Place?
Secure the edges of the landscaping fabric by employing staples or liquid nails to guarantee the rubber mulch remains in position and to thwart the development of air pockets. These air pockets can inadvertently create a conducive environment for weeds to grow underneath the rubber mulch, leading to instability.
Get Started Today
Transform your outdoor space with our expert surfacing solutions! Wondering if mulch glue is the answer to your rubber mulch needs? Look no further. Our experienced team specializes in providing top-quality surfacing services, including the application of mulch glue for secure and long-lasting results. Whether you’re looking to enhance your playground, garden, or landscaping project, we’ve got you covered. Contact us today to discuss your project and let us help you create a safe, beautiful, and functional space with our premium rubber mulch and professional mulch glue application.

